Working with account statements
In the Account statement section, you can get and view statements for your bank accounts.
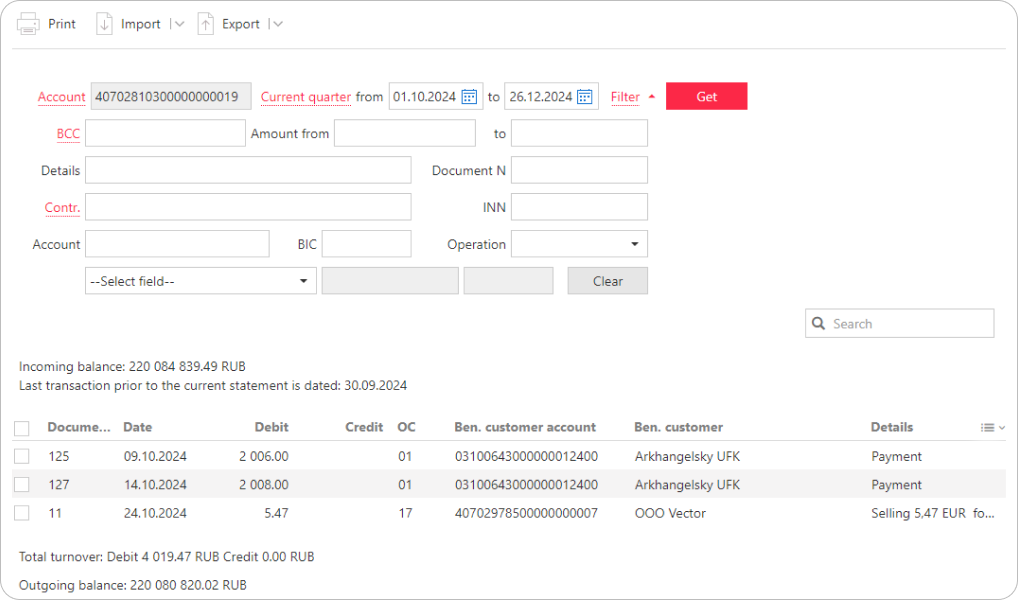
A statement is a list of transactions for a selected account, showing debited or credited amounts, the payment document number for each transaction, and other additional information.
How to generate a statement
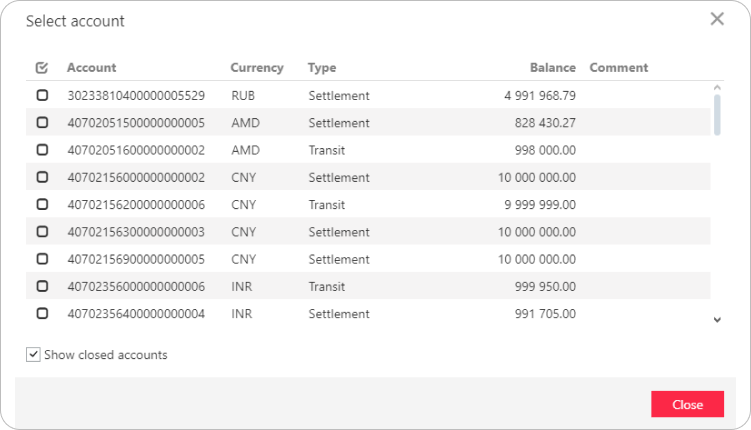
Select an account
Change the suggested account number, if needed, by clicking the link next to the field.
To see closed accounts, set the corresponding flag in the Select account dialog.
Select the required statement period
You can choose the period in two ways:
-
Select one of the predefined periods from the dropdown menu:
- Today
- Previous working day
- Week
- Last 30 days
- Current month (month-to-date)
- Current quarter (quarter-to-date)
- Current year (year-to-date)
-
Select Period from the dropdown menu and manually specify the start and end dates in the from and to fields, or use the calendar:
- If the from field is empty, the account opening date is used as the start date.
- If the to field is empty, the current date is used as the end date.
- If both fields are empty, the statement will cover the entire period from the account opening date to the current date.
The start or end date of the statement cannot be later than the account closure date.
Filter transactions
Click the Filter button and set the required parameters:
- Fill in the BCC field manually or using the respective link.
- In the Amount from and to fields, specify the range for transaction amounts.
- In the Details field, indicate the payment purpose (case insensitive).
- Enter the document number in the Document N field.
- Specify the contactor details:
- To use the directory, click Contr. and select a contractor from the displayed list. For more details on how to use the directory, see the Contractors section. The corresponding fields will be auto-filled.
- If the required contractor is not found in the directory, fill in the fields manually.
- Select the transaction type from the Operation dropdown: Debit or Credit. Leave it blank to display transactions of both types.
- If required, use the advanced filter:
- Select the field by which to filter in the dropdown marked "1" in the screenshot below.
- Done that, the fields marked "2" and "3" will appear. Use them to specify the required field value and the needed condition (whether this value is to be matched or not).
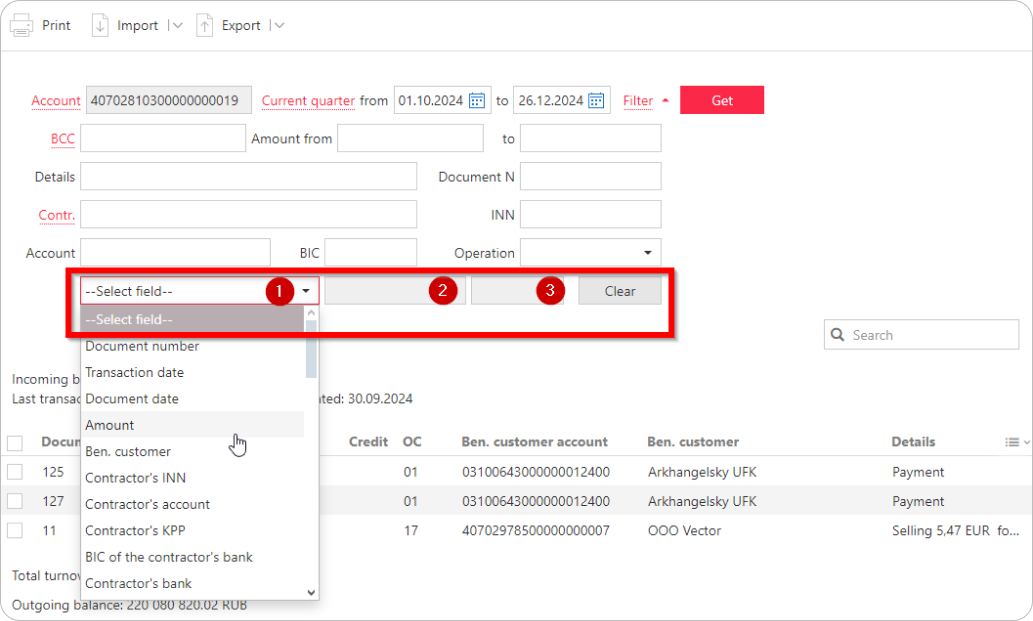
Click Get to generate your statement. To clear the filter, click Clear.
If the statement end date exceeds the last closed day of operations, the generated statement will be marked as Preliminary statement.
How to print a statement
You can print the generated statement by clicking Print and setting the necessary printing parameters.
To print selected transactions only:
- Select the required transactions on the list.
- In the context menu, choose Print → Selected transactions.
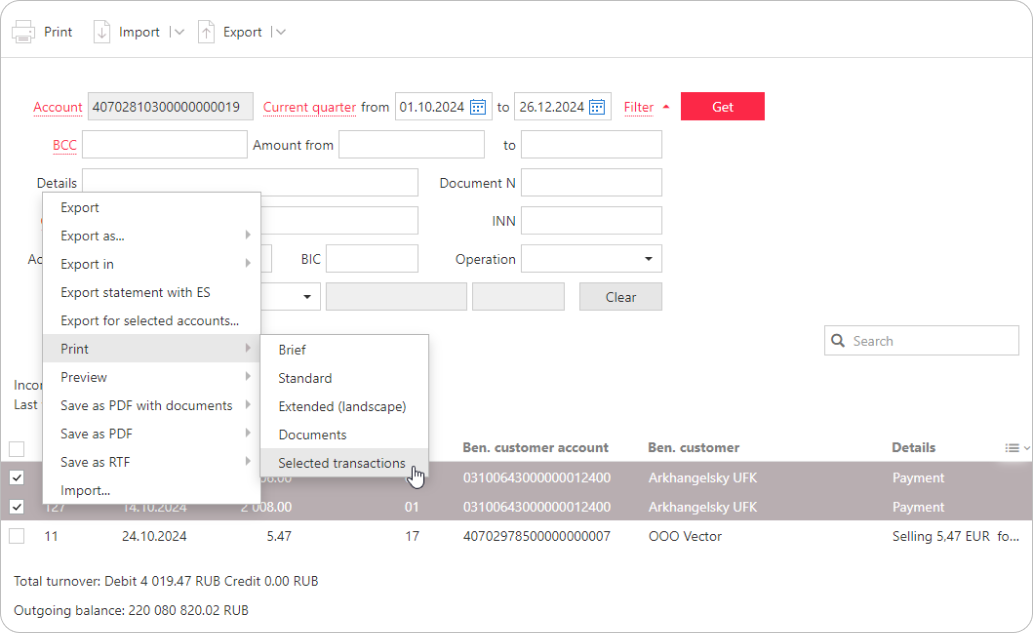
The print format for the selection is similar to the Standard statement printing format.
The statement print format options are described in the Settings section.
How to import a statement
You can import statements for the external accounts registered in the system. Click Import and choose the format: iBank2 or 1C. For more details, see the Importing documents section.
How to export a statement
You can export a generated statement in various ways.
For more details, see the Exporting documents section.
The documents included in a statement can be saved for printing in the PDF or RTF format.
To do this, select the necessary documents, open the context menu, and choose Save as PDF/Save as RTF → Documents.
This will generate a file in the selected format with the following name:
<Transaction date>_<Account number>_<Document type>_N_<document number>_dated_<document date>.
If multiple documents are selected:
-
If the Export to the single file option is unchecked, a single file will be generated in the selected format with the following name:
Documents_list_for_account_N_<Account Number>_for_the_period_from_<start date>_to_<end date>. -
If the Export to the single file option is checked, a ZIP archive will be generated with the following name:
Documents_list_for_account_N_<Account number>_for_the_period_from_<start date>_to_<end date>.
In this archive, the files for debit transactions will be put into the Outgoing folder, and the files for credit transactions will be put into the Incoming folder.
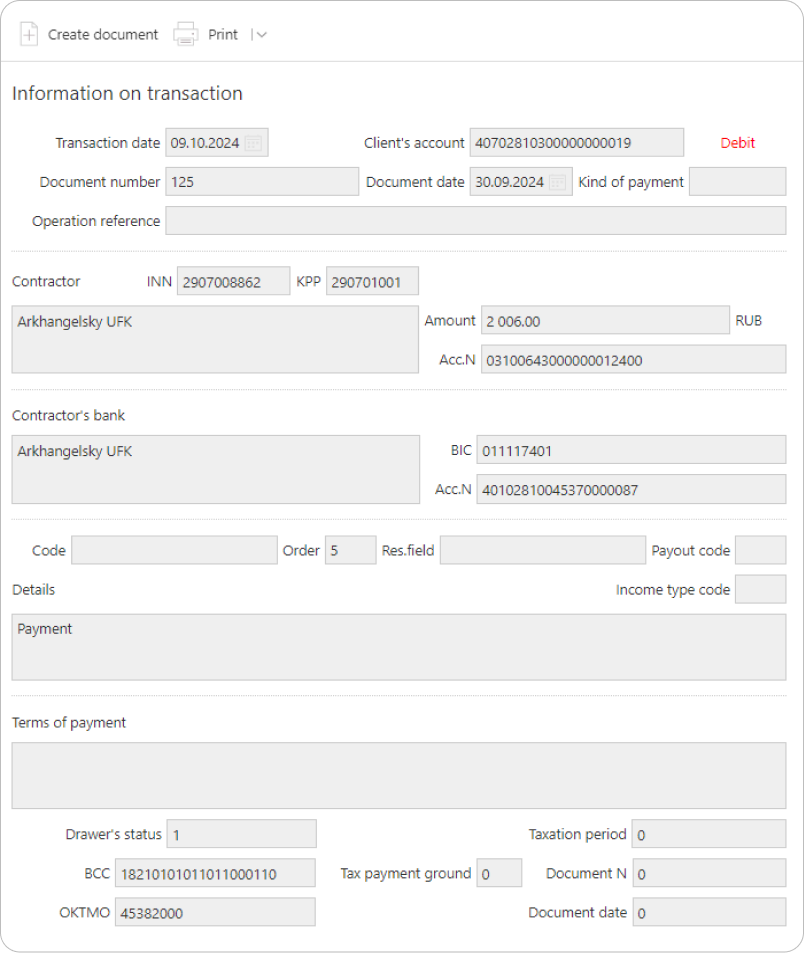
To view detailed information on any specific transaction, click a transaction on the list to open the Information on transaction form.
How to create a payment order
To create a payment order for ruble settlement accounts, click the required account.
In the opened Information on transaction form, click Create document.
This will open the payment order form.
The payer's and recipient's details from the transaction information will be auto-filled in the created document.
You can print and/or export the document. To do this, click the corresponding buttons in the Information on transaction form.
The Export button is available if the statement is signed with a Bank employee's ES.